Real-World React, Part 2: Project Setup
This post is part of a series on Real-World React & Flux.
In my last post, I outlined the goals of this project, code-named Millhopper. In this post, we’re going to start building up the project structure and configuring all of the tooling.
Installing dependencies
Before we can start writing code, we’ll need to install a few dependencies. Most of the tooling we’re going to use requires NodeJS, so let’s install that first.
Note: I’m doing this project on a Mac. Nearly all of the steps that follow are cross-platform; this one is not. If you’re using Windows or Linux, check the NodeJS website for installation instructions.
The easiest way to install Node is the official installer - but the easiest way isn’t necessarily the best way. Node moves quickly, and over time, it’s likely that you’ll need to support projects that require different versions of Node, and the official installer doesn’t handle that requirement well.
One tool that does allow for multiple installed versions of Node is NVM. NVM provides a simple command-line interface to install and manage Node versions.
To install NVM, follow the instructions on the NVM website - or just paste this into the OS X terminal:
curl -o- https://raw.githubusercontent.com/creationix/nvm/v0.26.1/install.sh | bashThis is probably a good time to note that a lot of Javascript tools don’t have graphical interfaces, so if you’re not comfortable working from the command line, now would be a good time to do some extracurricular reading.
Installing NVM doesn’t actually install Node, so let’s do that next. The current stable version of Node is 4.1.0, so we’ll install that:
nvm install stableNVM doesn’t make any assumptions about which installed version of Node you want to use, so we’ll need to tell it to use the version we just installed:
nvm use stableNow that Node is installed, we can use NPM (the Node package manager) to install the rest of our dependencies. Most of the tools will be installed locally to the project, but a few work better if they’re also installed globally:
npm install -g webpack webpack-dev-server mochaInstalling these tools globally like that allows us to use them by name on the command line; if they’re only installed locally, actually getting at the executables is a bit of a pain.
Defining the project structure
Now that all of the basic tooling is in place, let’s start building up the project’s structure. Start by initializing a Git repository:
mkdir millhopper
git init
Eventually, Millhopper is going to have a bunch of project-specific dependencies. Let’s make pulling them down easier by having NPM create a project.json file:
npm initproject.json is used for a lot of things, like defining metadata about the project, listing dependencies, and making scripts to build and test the project. Running npm init ensures that the file is created correctly. If you’re not sure about the answers to some of the questions NPM asks (I wasn’t), just accept the defaults - they’re fine for this project.
Now we’re ready to start layout out the project files. The best way to structure a Javascript project is something of an open question. I’m not sure if there really is a “best” way, and I haven’t been able to find any clear consensus out there.
Lacking any authoritative guidance, here’s how we’re going to lay out Millhopper’s files:
/: configuration files, build scripts, README/app: all of our application code/css: stylesheets (though they’re actually SCSS files here)/test: unit tests/dist: production-ready, compiled source files
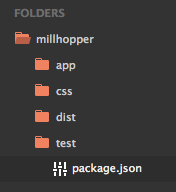
At this point, the project directory should look like this:
Configuring Webpack
Since this is a pretty small project, we’re going to want a way to combine our various Javascript files into a single, minified file for production use. We’re going to use Webpack for this, so let’s pull that down from NPM and save it as a development dependency:
npm install webpack --save-devYou might recall that Webpack is already installed globally - why do we need to install it locally as well? Unfortunately, we can’t specify global dependencies in our package.json file, and we want this project to be easy to set up again later - so we’ll install Webpack locally and point our NPM scripts at the local version, so the project can be built after a simple npm install. The global version is just a convienence.
By default, Webpack looks for configuration in a file called webpack.conf.js, so let’s create that in our / directory and add some minimal configuration to it:
module.exports = {
  entry: __dirname + '/app/index.js',

  output: {
    path: __dirname + '/dist',
    filename: './app.js'
  }
}
In order to build Millhopper, Webpack needs to know two things:
- Where app execution starts - Webpack calls this the entry point.
- Where the compiled version of the app should be written - Webpack calls this the output.
For Millhopper, we’re defining the entry point to be a file called index.js in /app. The compiled output will go into a file called app.js, in /dist. Don’t worry about __dirname - it’s a magic variable that Node provides, which contains the path of the project directory.
Before we go any further, let’s verify that our basic configuration works. Create the entry file in /app/index.js, and put some Javascript in it:
console.log('hello, webpack!');Now we can run a Webpack build and confirm that the compiled file shows up in /dist/app.js:
webpackHandling ES6 Compilation
Webpack now knows about the basic structure of the project, and it can process our Javascript - but only our ES5 Javascript, and we want to write our code in ES6. Luckily, we can extend the built-in behavior of Webpack by adding in a loader to process our ES6.
First, we’ll need to install the loader as a development dependency:
npm install --save-dev babel-loaderNow, we’ll need to configure the loader in our Webpack config:
module.exports = {
  // ...

  module: {
    loaders: [
      {
        test: /\.js$/,
        exclude: /node_modules/,
        loader: 'babel-loader'
      }
    ]
  },

  resolve: {
    extensions: ['', '.js']
  }
}
That configuration tells Webpack to pass any files with a .js extension to the loader for processing. Since that probably also includes a bunch of files in /node_modules that we really don’t want to transpile, we also tell Webpack to exclude the modules directory.
The resolve block tells Webpack to add .js to import statements that don’t have an extension. That’s not strictly necessary, but it will make importing modules a little cleaner when we get around to writing code later.
Let’s change index.js to include some ES6 code to make sure everything’s working:
let hello = () => {
    console.log('hello, webpack!');
};

hello();
Go ahead and run the webpack command to make sure the ES6 compiles correctly.
Setting up a web server
At this point we’ve started to write some code, so let’s create an HTML file in /app where we can run the Javascript produced by Webpack:
<!DOCTYPE html>

<html lang="en">
  <head>
    <meta charset="utf-8">

    <title>Millhopper</title>
  </head>

  <body>
      <script src="app.js"></script>
  </body>
</html>
We want this file to be included in the /dist folder when we run Webpack, but right now, our configuration only handles Javascript files. Let’s fix that by adding in a loader for HTML files:
npm install --save-dev file-loaderAnd then in our Webpack config:
module.exports = {
  entry: {
    javascript: __dirname + '/app/index.js',
    html: __dirname + "/app/index.html"
  },

  // ..

  module: {
    loaders: [
      // ..

      {
        test: /\.html$/,
        loader: "file?name=[name].[ext]",
      }
    ]
  },

  // ..
};
Note that we replaced our entry block with some new code that names our entry points - one for the Javascript, and one for HTML.
Running webpack should copy the index.html file into the /dist directory. We could open the file up in a web browser to make sure everything worked, but eventually, our Javascript is going to want to make some network calls, and that’s not allowed for HTML files that were opened with the file:// protocol. We’re going to have to find a way to serve our files from an actual web server.
Luckily for us, Webpack has a web server we can use called webpack-dev-server. Much like Webpack itself, we should install it locally (it’s already installed globally):
npm install --save-dev webpack-dev-serverWhen I installed this package, I got a bunch of really scary-looking error messages in the terminal. I don’t know why that happened, or how to prevent them in the future, but if you get them too, don’t worry - running the server still seems to work as expected.
Once the server is installed, launch it from the terminal and then navigate your web browser to http://0.0.0.0:8080:
webpack-dev-serverYou should run the server from the root project directory - you might get unexpected results if you run it from elsewhere.
Most of the documentation suggests that you should be able to view your site at localhost:8080, but for some reason, that didn’t work for me. If you find yourself in the same boat, you can tell the server where to serve the site from:
webpack-dev-server --host localhost --port 8080Typing that command over and over is a bit of a drag, but we don’t have to do it every time. NPM supports running scripts that are defined in package.config, so let’s try adding a script to run the web server:
{
  // ..

  "scripts": {
    "start": "./node_modules/.bin/webpack-dev-server --host localhost --port 8080"
  },

  // ..
}
Since we’re writing a script to launch the web server anyway, we can use the locally installed server executable, which means the script will work even if webpack-dev-server isn’t installed globally.
Now we can launch the web server with a simple npm start.
What about live reloading?
webpack-dev-server can do more than just serve our files - it can also tell the browser to live reload our app as we change the code. Webpack does this by compiling our code on the fly and serving it directly from memory via a virtual “public” path.
To get live reload working, we’ll need to set up the public pack in our Webpack config:
{
  // ..

  output: {
    path: __dirname + '/dist',
    filename: './app.js',
    publicPath: '/public/'
  },

  // ..
}
We’ll also need to make sure index.html loads our Javascript from a relative path:
<script src="app.js"></script>Don’t forget this step. When webpack-dev-server runs in live reload mode, it never writes to disk - it serves all of the files it processes from the public directory instead. We’ll be accessing our app from that directory, so the HTML has to point at the in-memory file.
To launch webpack-dev-server in live reload mode, we just add two new flags to the start script:
"scripts": {
  "start": "./node_modules/.bin/webpack-dev-server --hot --inline --host localhost --port 8080"
}
Now when we run npm start, we just need to navigate the browser to http://localhost:8080/webpack-dev-server/ instead (don’t forget the trailing /). Changing files while the server is running should reload our content automatically.
If live reload isn’t working, make sure you’re including the /webpack-dev-server/ in your URL. Live reload doesn’t work without it.
Setting up the testing environment
At this point, we have a functional build process and a way to run the app. Before we start writing code, let’s get a test harness in place. We’re going to be using the Mocha test framework and the Should assertion library, both of which need to be added as dependencies:
npm install --save-dev mocha shouldWriting a Mocha test is as simple as dropping a test.js file into the /test directory:
var should = require('should');

describe('A test framework', function() {
   it('should be able to run a test', function() {
    var one = 1;
    one.should.equal(1);
   });
});
Run the test with the mocha command. It should pass.
A brief aside for OS X and iTerm2 users
If you’re running iTerm2 on OS X with the popular Solarized Dark theme installed, you might notice something strange - the description of the test doesn’t show up in the Mocha output:
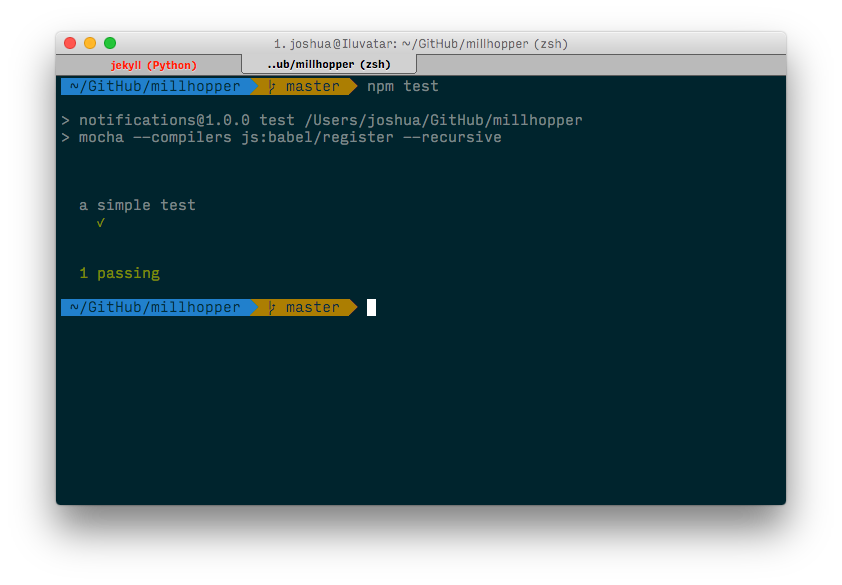
That’s happening because Mocha outputs the test description in a non-standard terminal color that’s the same color as the Solarized Dark background - or very close to it. There’s some debate over whether this is a Solarized bug or a Mocha bug.
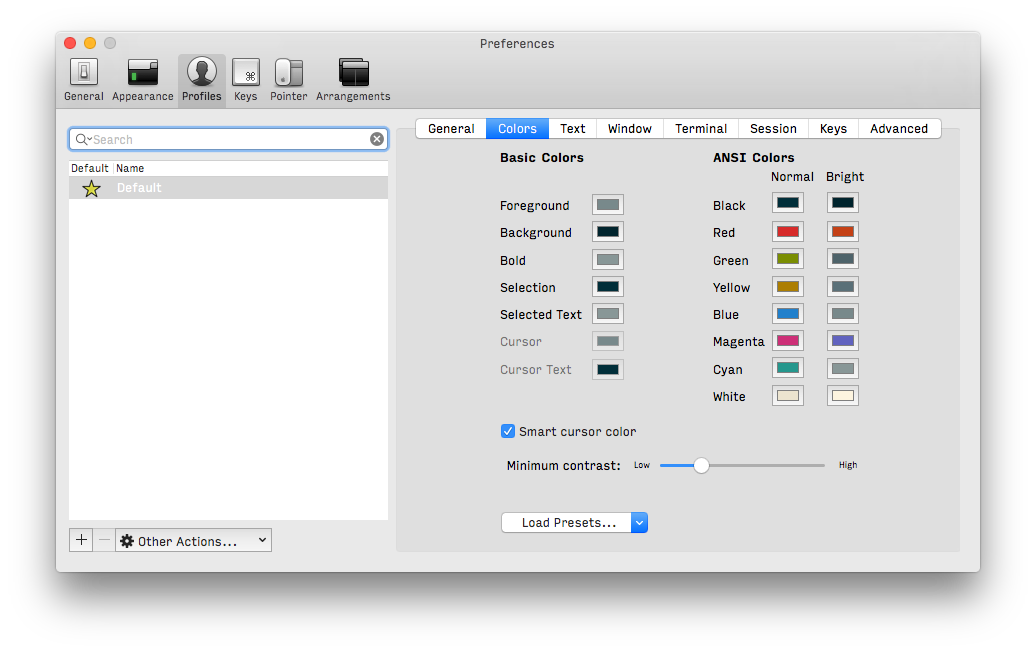
It’s fixable by either switching themes (I’ve found the Tomorrow Night Eighties theme works well), or increasing the contrast in iTerm2’s settings:
Dealing with ES6 (again)
Much like Webpack, Mocha doesn’t know how to deal with ES6 files out of the box. This isn’t a huge problem, because Mocha allows for pluggable compilers that allow it to process ES6 code.
First, we need to install Babel locally:
npm install babel --save-devIf you were wondering - this is a different dependency from the babel-loader we installed earlier. babel-loader uses Babel under the covers, but it doesn’t expose the transpiler to other packages, so we have to install Babel ourselves.
Now we can launch Mocha, specifying that we want to use the Babel transpiler:
mocha --compilers js:babel/registerWe don’t want to type that any more than we want to type out that long web server command, but this time, we’ve got more options. The first way is to add the mocha command to package.json:
{
  // ..
  "scripts": {
    "test": "./node_modules/.bin/mocha --compilers js:babel/register --recursive",

    // ..
  },

  // ..
}
Mocha also provides another way specify how we want to run our tests: we can create a file called mocha.opts in our /test directory and add our command line arguments to it:
--compilers js:babel/register
--recursive
There’s a new wrinkle here. As the number of tests in our project grows, we’re going to want to split them up into their own directories. By default, Mocha only looks in /test for tests, so we can add the --recursive argument to tell it to search sub-directories, too.
Now you should be able to use ES6 in your test code:
import should from 'should';

describe('a simple test', () => {
  it('should run a simple test', () => {
    let one = 1;
    one.should.equal(1);
  });
});
SO MUCH CONFIGURATION
This post is almost 2,500 words long and we still haven’t written any actual app-specific code. Remember when I said starting from scratch probably made things harder than they have to be? Now you understand why.
In the next post: actual, honest-to-goodness React code.